Getting started
Botami gives your business three AI assistants, managed from a single dashboard: the chatbot on your website, the callbot on your phone line and the WhatsApp agent on your WhatsApp Business number. All of them answer from your own information, collect contacts and book appointments.
The three assistants
| Assistant | Where it answers | What it does | Billing |
|---|---|---|---|
| Chatbot | On your website (widget at the bottom of the page) | Answers visitors, qualifies contacts, books appointments, asks your qualification questions | Conversations per month |
| Callbot | On a dedicated phone number | Picks up 24/7, informs, books appointments, transfers to your team, sends a call report | Minutes per month |
| WhatsApp agent | On your WhatsApp Business number | Answers your customers on WhatsApp, alongside your app | Conversations per month |
Your first chatbot
- 1
Your website
Sidebar → Chatbots → create button: the guided start opens. Pick your site's platform and enter its address (for example https://www.mysite.com). The widget only answers on this domain and its subdomains. The chatbot name is optional and only visible to you: left empty, it is the site's domain, followed by “(2)”, “(3)”… if already taken; a name you type must be unique. Several chatbots can serve the same site.
- 2
Prepare the agent
Botami reads your public pages to prepare a first knowledge base. You check what it understood; everything can be edited later.
- 3
Goal and style
What the agent must achieve (inform, generate leads, book appointments), its messages and its look on your site. As soon as the objective sends emails (leads, appointments, guest support), the “Who receives the requests?” field asks for the addresses to notify.
- 4
Install
Add the code or the plugin (see “Installing the chatbot”), then enter a page of your site: Botami checks that the widget and your key are there.
- 5
Test
Open your site in a private window, ask a few questions, and adjust the knowledge base if an answer is missing.
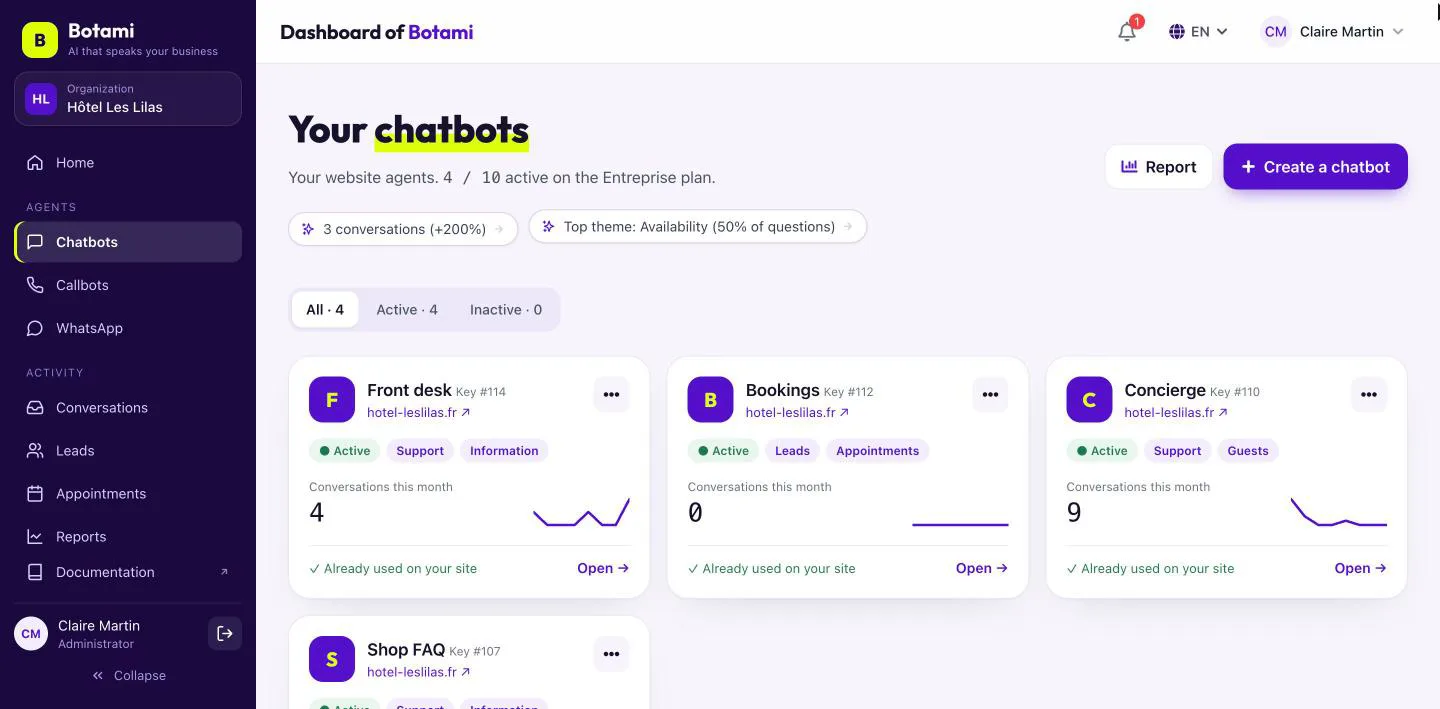
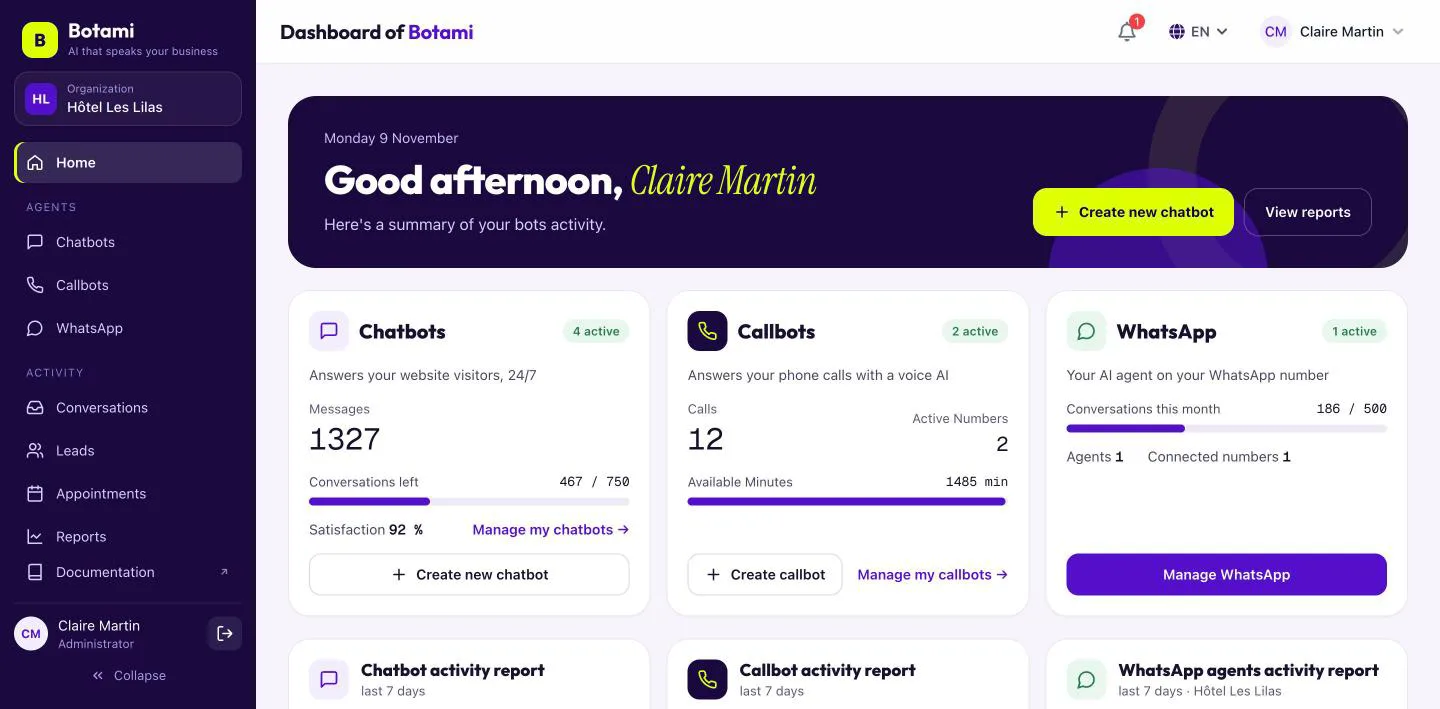
Finding your way around the dashboard
- Home: “Getting started” (verify your email, create a first agent, complete billing details, unanswered questions), one card per product with its usage, the seven-day report preview and recent activity.
- Agents: Chatbots, Callbots and WhatsApp. Each page shows your agents as cards (All / Active / Inactive filter); “Open” leads to the agent's page, with its settings tabs.
- Activity: Conversations (calls, WhatsApp messages and chatbot conversations), Leads, Appointments and Reports (Chatbots, Callbots and WhatsApp tabs).
- Connections: one page with three tabs. Integrations (calendars and other tools shared by all your agents, shortcuts to your agents and their plans), Automations (API actions and webhooks) and Claude connector.
- Account: Plan and invoices (plans, payment card, invoices; administrators) and Settings and team (Team, My profile, Security, Preferences, My data tabs), then Support (your requests to the Botami team).
- At the bottom of the sidebar: the documentation, your account and sign-out.
Can't find the answer?
Write to us. We answer in English and French, usually within one business day.